Motion Detection
Motion detection in this system is done through a Logitech HD920 Webcam which interfaces with the Intel Edison. This code utilises the OpenCV package which has numerous useful functions such as VideoCapture() and other video and image processing functions.

The function defined above can be called by the main file to get the amount of motion in the room over a given time period. The constants are being declared in this first few lines of the code. Camera is being instantiated via the cv2.VideoCapture(0) which initialises the camera to start recording. The constant avg = None because it assumes that every call of the function is a new call and so the reference frame must be retaken. Count and sum are initialised to zero.

This section of the code ensures that the motion detection only runs for a total of 10 seconds as it is being checked within the boolean return of the while loop. camera.read() returns a boolean value that is stored in grabbed and the current frame in frame. The current frame is then resized into a width of 480 and processed using cvtColor and GaussianBlur. These two functions converts the frame image to gray and smoothens the image using Gaussian blurring. Color has no implications on the motion detection algorithm and therefore there is no need for the image to be in colour. If avg is None initialises the code to set the current reference frame.

This segment of the code takes the weighted mean of the previous frames along with the current frame as seen in cv2.accumulateWeighted(). This takes care of any slight deviations in the lighting conditions that might cause the script to falsely detection motion when there is in fact none. The difference between the two frames are then subtracted and stored in frameDelta. This value is the difference in the two weighted averages between the background model and the current frame. This value is then compared against a threshold value to located regions in the image that contain substantial differences from the background model stored in avg. The function cv2.findContours loops over each of the contours and stores that contour detection value in the variable cnts.

This segment of the code checks the variable cnts, if it is not empty, compare the values with a min_area constant that we have set to be 200. If cnts is more than the value of 200 then add that frameDelta value into sum. When the sum has been accumulated over a time period of 10 seconds, this value is divided by 20000 and returned from the function as an indication of how much motion there is within the given time frame. Finally, the camera is being released and the function ends.

Song Generation using Spotipy
Spotify API has an open python package called Spotipy that allows a user to make function calls to the streaming service. These function calls allow the user to remotely modify/ create a playlist and get song recommendations based on a few input parameters. A few key functions that will be highlighted here to show the functionality of the code.
Firstly, playlist creation through the API must be created by first using the oauth token that can be requested from Spotify by providing a given set of secret keys that are available through the Spotify developer's page.

The snippet of code above shows that the scope has to be declared and passed into the request for token to allow Spotify to process which read and write accesses the token needs to come with.
Once the token has been generated, the user can call the function user_playlist_create() to create a playlist with the name playlist_name1. Following this, two very important function calls add_tracks() and gett_rec() are being utilised to add tracks to that playlist and get song recommendations.

The function gett_rec is first called by the program which furnishes the predicted values of acousticness, energy, danceability etc. These values are then passed into Spotipy through the function call sp.recommendations() and a list of songs is returned into the variable rec. This list of song IDs are then passed into the add_tracks() function call to add those specific songs into the playlist. Everything in Spotify can be uniquely identified by its own ID, every song and playlist has its own unique ID.
The remaining part of the code that can be found on the github repository is to provide additional functional checks to remove an duplicate songs that might be included in the recommendation and also to check for duplicate playlists. Currently, the program only supports the use of 1 active playlist for song generation and playback.
IMPLEMENTATION

Light Intensity Measurement and Time of the Day
Light intensity in the room is measured in a pretty straightforward way, a light dependent resistor is attached to the Intel Edison which records the amount of light available in the room. Since the Intel Edison uses a 10bit Analog to Digital convertor, the recorded values range from 0 to 1023 where 0 represents no light and 1023 represents high light intensities.
The time of the day is also implemented by converting the UTC datetime format given by the python import of time into standard New York time. The only caveat is that the system is only interested in hourly changes since changes per minute are not very useful in the predictive model.
Counting the Number of People
The purpose of facial recognition in this system is to obtain the number of people present in a given setting. It is done using the Logitech HD920 Webcam and the code also utilizes OpenCV. It uses machine learning algorithms to search for faces within a given frame taken from the webcam. The algorithm mentioned below breaks the task of identifying a face into thousands of smaller tasks in locating patterns/features of a face. OpenCV then uses cascades to break the problem of detecting faces in a multi-stage process and will only return true if all the stages succeed. The cascade is in itself a XML file containing data used to identify objects.
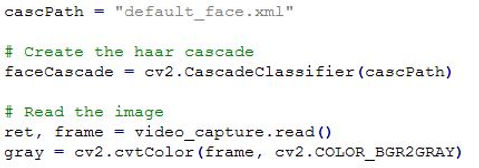
Applying each and every feature data set to the training frame, a certain set of threshold values can be used to best classify the presence of a face. The following snippet of code first instantiates the VideoCapture() function of the camera to initialise it, much like that in motion detection. Then the path for the cascades data file is created upon which a cascade is created using the CascadeClassifier() function. Once again, the image is converted to greyscale since colour does not affect our algorithm.
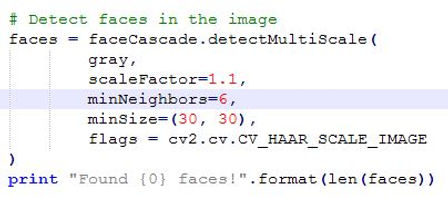
The third snippet of code then goes through a series of steps to detec the number of faces in the given image.
-
detectMultiScale() function is a general function that detects objects. However, since the point of interest is to detect faces, the earlier created cascade is used to call the function.
-
scaleFactor compensates for the depth changes to the faces that are present in the image where faces at the back appear smaller than faces in the front.
-
The detection algorithm uses a moving window to detect objects and so minNeighbors defines how many objects are in the region of the currently detected box before it declares that a face has been found. minSize gives the threshold of the window size that determines if that window being drawn is a face or not.


Training DataSet
The training data set created through the valuable input of friends and peers. They generated data sets of values for each of the attributes that are used in the song generation. Each training data set contains approximately 89 values comprising various surrounding conditions and the attribute value associated with them. For example in this line extracted from the data set.
The first line shows that there is only 1 person in the room with a high level of lighting and low motion levels at 7pm in the evening, this corresponds to a low danceability value of 0.19. The second line shows that there are 108 people in the room with low levels of lighting and high levels of motion, this corresponds to a high value for danceability as this probably relates to the surrounding conditions found in a pub at night. The reason behind such a personalized data set comes from the fundamental reason that the system is created for the user and implemented by the user.
AWS Machine Learning
After all the methods described above are utilised to gather data about the surroundings, this data must then be sent to the AWS Machine Learning module where a prediction can be made on the attributes required for song generation. The AWS Machine Learning module takes in our training set of data which contains the various conditions for different genres and different attribute values. It then generates a predictive model which we have set to be classification for the attribute of 'genre' and regression for the list of attributes below:
-
acousticness
-
popularity
-
energy
-
danceability
-
instrumentalness
Each of these attributes will be further explained in the section: Spotify API, but for now, each attribute has a range of values from 0 to 1.0 and the Machine Learning model takes in our gathered data and predicts a set of values for each of these attributes. The training dataset generated endpoints which contained the models for prediction and can be accessed on demand from the Intel Edison to make predictions based on input values.